I started with a blockout of the base character. I formed out what I imagined to be the proportions of the body.
I then took the mesh into character creator along with a few of the critical props and posed it according to the concept. I tried to be as accurate as possible with the rig CC4 gave me (which is pretty good). One of my biggest goals here was to get the character pose to feel natural in 3D. I had to work within the guidelines of how far the oar had to be in front of the large hat without it clipping. This meant that the character had to reach out pretty far. I matched concept by overlaying PureRef.
After I got the pose out of CC4 I cleaned it up in ZBrush- Just more pushing and pulling.
Then came the looong process of matching the whole outfit to the concept. the most challenging part was figuring out the clothing pieces.
Here is the full blockout of the character with subdivisions applied.
I also did a texture test to make sure I had a plan for rendering. The plan is to polypaint and render out BPRs in ZBrush. Since I will not be doing a game res mesh, Ill be creating the outlines with reversed geo. I like this method because I can easily control the thickness on the heaver shadows.
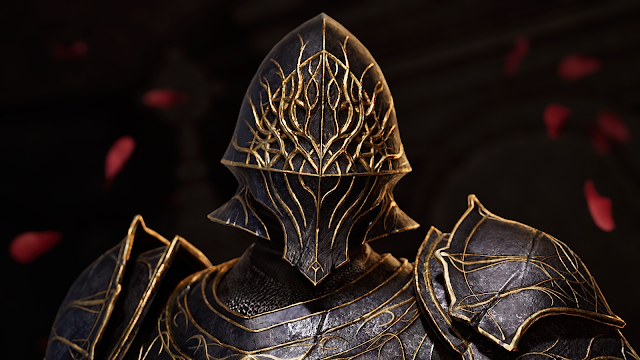
With the completion of the sword, I've decided to include the full showcase of the knight project. This project has been a crazy journey, from the start being a hard surface study to all the parts I needed to research along the way. Yeah, my scope was stupid, but I'm glad I did every part to the best of my ability. I've definitely improved because of it. I think I need a breather now tho gohdam. Well, that's all for this one I think, thanks to everyone who gave me feedback and helped me along the way.
Hello everyone. From having just come out of multiple consecutive hard surface projects, I wanted to share my process as I've learned a lot.
This process mainly involves using ZRemesher as a tool to get your shapes into clean and easy to work with pieces for the rest of the sculpt process. I see a lot of people think of this function as a optimization tool to be used as a pseudo retopo replacement in the later stages. For many hard surface pieces, the approach of simplifying first removes a lot of the need to worry about that stuff later, much like Sub-D modeling - just in ZBrush! :)
To start, you want to get a blockout of your mesh that can represents the final shape. Try to get close, but its OK if its ugly or needs adjustment. You will be using this as your starting piece. The method will also depend on what exactly you are creating, for example there might be different approaches to fitted armor pieces than a weapon. At this stage, you can block out with dynamesh sculpting, or poly modeling. Once you get the blockout, the goal is to get it to a simple, easy to work with mesh.
Once you have this shape, if the topology is organized, great! If not, its time to do some cleanup. You want to get the piece as simplified as possible. This way, you can very easily make large proportional changes without having to worry about surface wobble. This is where ZRemesher comes in. I will use an example of this chestplate since it is fairly simple. My blockout is just a roughly sculpted mesh to give me the shape. I mask out the chest plate area and use extract to separate the mesh.
From here, you want to delete the back faces. Working with thin meshes sucks in ZBrush. As long as the original piece was one polygroup, you should be able to isolate the outer face and delete hidden.
Geometry > Modify Topology > Del Hidden
With this plane you can now reduce the complexity with ZRemesher. I click off all the settings except half because that gives me more control. Half will bring it close to half its current density, which you can keep clicking to bring it down. The adapt button will basically give it more poly budget to try to keep the shape, but prevents you from going super low so I don't really use it. Try to get a mesh that is low as you can with it still having decent topology. Once you have that you can use the Polish by Features (Deformation > Polish by Features) and button to give you a nice surface.
Edge case - If when you try remeshing, ZBrush gives you really bad edge topology, you could try slicing the borders off with Slice Curve, or using Polish by Features between remeshes. Sometimes wobbly edges will make remeshing break. Hold Ctrl + Shift to access the cutting tools, and select slice curve. this doesn't work in symmetry so just do one side and the mirror and weld. Once you slice the edges, hide those polygroups and delete hidden.
Deleting wobbly edges with slice curve
Once you have a simplified mesh, you can easily move the verts around and use polish and smoothing features to get the shapes you want. This is where you can start working non destructively. Activating dynamic subdivision, lets you preview subdivision levels without applying the subdivision. Keep in mind, this is just a preview, and you are restricted by your current vertices. This is really good though for hard surface since you can still edit your low poly mesh, unlike with normal subdivision.
Once you are ready to add thickness, you can turn off dynamic subdivision and add thickness with panel loops. (Dynamic SubD lets you apply thickness but I kind it give worse results)
PanelLoops under Geometry>EdgeLoop.
Settings for adding thickness
This is the point where I really suggest learning ZModeler. Knowing how to make changes to the low poly mesh will give you way more options. The crease tools are also really helpful for controlling your shapes. To show an example of how controlled this method can be this was the main process I used for my mech hand.
So apparently ZModeler is unintuitive or something. I figured I would mention the tools I feel like are the most commonly used within the kit.
Vertex:
Move & Slide - This is pretty self explanatory, use this if you need to adjust vertexes. Attraction Valence will cause near verts to merge
Edge:
Insert Edge Loop - Big one for adjusting topology. Hold alt to remove edge loop
Crease - Good for controlling your shape. You can see its effect when turning on Dynamic SubD
Scale - Mainly used with full edge loops. Good for controlling the surface curve of your object
Extrude Move - Creates a new face off of the selected edge. Nice for fixing topology along with vertex move
Bridge - Bridges edges. Also nice for fixing topo and filling holes.
Face:
Polygroup - Probably the most important one for accurate modeling in ZBrush. Using this to separate off parts of the mesh to hide, isolate, extrude, etc is very helpful. I use poly-loop target a lot to change large sections to a different polygroup
Extrude - I use this a lot with 'polygroup all' target to extrude certain sections of the model. Helps you make some more complicated shapes
What helped me get the tool to click was to just see how other people use it. This helps you recognize what situations you can use it for and how to approach the problem. This is a long video but just skip through it and watch how different shapes are manipulated.
This is another video, that's more of a guide that was also really good. It goes over a similar hard surface process, I would say its a little more freeform, and would still need to be retopoed. For my process I like to keep as much of the blockout for my low poly bakes as possible.
Heres a good example of where I think a good blockout falls to be ready to move on to subdividing and sculpting your high res.
Part 2 - Clean Sculpting Practices & Linework
From this point we will be moving to regular subdivision levels. Once you apply dynamic subdivision, they will convert into normal subdivision levels. Having normal subdivision is extremely helpful. When you have a low poly base, it allows you to make changes on every level of detail. If you need to make a large proportional change after already doing detail work, instead of being impossible, you can lower the subdiv and make your changes on a level you have more control.
Making large changes on lower subdiv prevents surface wobble
Layers are also very useful for keeping work non destructive. You can adjust things like intensity of your sculpt detail, and it gives you tons of options to "erase" with morph target when activating and deactivating layers.
Method for this linework:
The main tool for this is ScribeChisel. There's a little setup required but once you get the hang of them it allows you to edit strokes extremely easily. Here is the breakdown of how I use this brush:
Continuing on, you'll want to set the bush to ZAdd which will cause your brush to build up rather than in, and pin the stroke palette for some extra functions. Open the curve falloff to open the graph that determines you stroke shape.
You can adjust the points of the graph to determine the stroke as shown here:
Saving a morph target before creating your lines will enable them to seamlessly intersect without building on top of one another.
Right with morph target
If you want to an easier time with texturing, fill your object with a solid color, and enable RGB on the scribe brush. Now your strokes will have poly paint data that can be used as an ID mask in substance painter. Keeping polypaint data can be sometimes be hard to deal with, especially with decimation. If decimation breaks because it is trying to keep your paint data, you could always duplicate your mesh and project the only paint onto the decimated mesh, which will still work for baking.
Using this method, i built off of my layers from primary, secondary, to tertiary detail